True garden self-sufficiency isn’t about better composting; it’s about designing a closed-loop ecosystem that eliminates the need for external inputs entirely.
- Mastering the Carbon-to-Nitrogen ratio is the key to unlocking high-quality, on-site fertility from materials you already have.
- Specific plants like comfrey, cardoon, and green manures are not just decorative; they are functional tools for mining nutrients and building soil structure from within your system.
Recommendation: Stop thinking like a consumer of garden products and start acting like an ecosystem architect with our 3-year plan for total fertility independence.
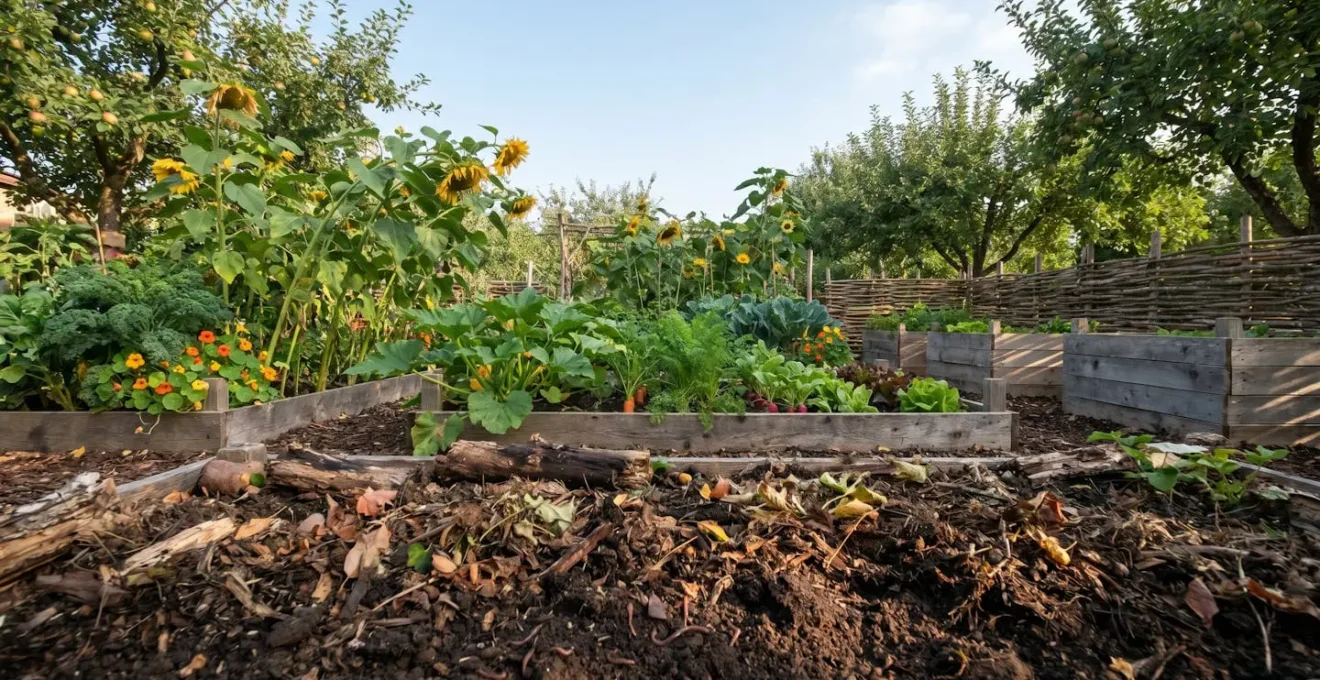
For many eco-conscious gardeners, the seasonal ritual is the same: a trip to the garden center to haul back heavy bags of compost and bottles of fertilizer. We do it to enrich our soil and feed our plants, but in doing so, we perpetuate a cycle of dependency. We remain consumers, importing fertility instead of generating it. While starting a compost pile is a laudable first step, it often doesn’t break this cycle. It’s merely one component in a much larger, more elegant system waiting to be built.
The frustration of constantly needing to add more, buy more, and import more is a sign that the garden is not functioning as an ecosystem, but as a production line. The shift required is profound but simple: we must stop managing individual plants and start orchestrating a whole system. This means becoming an ecosystem architect, designing feedback loops where the « waste » from one part of the garden becomes the « wealth » for another. It’s about closing the loop on nutrient cycling.
This approach moves beyond simple composting. It involves techniques like in-situ decomposition, growing your own mulch, and using specific plants as biological miners to draw nutrients from deep within the soil. It’s a transition from a system that consumes to one that produces and regenerates. This article provides the principles and a clear, three-year roadmap to guide you in transforming your garden into a truly self-sustaining ecosystem, liberating you from the need to ever buy compost or fertilizer again.
This guide is structured to walk you through the core principles and practical steps of creating a closed-loop garden. Below, you will find a detailed breakdown of the key strategies that will empower you to build a resilient, productive, and truly self-sufficient ecosystem.
Summary: Your Blueprint for a Self-Sufficient Garden Ecosystem
- Carbon to Nitrogen Ratio: The Secret to Fast In-Situ Composting?
- Chop-and-Drop: Is It Messy or the Ultimate Fertilizer technique?
- The Import Risk: Why Buying Topsoil Threatens Your Ecosystem?
- Comfrey and Cardoon: Growing Your Own Mulch in a Corner?
- When to Stop Inputs: How Long Before a Garden Balances Itself?
- Mustard or Phacelia: Which Green Manure Fixes More Nitrogen?
- Cardboard and Compost: How to Convert a Lawn to a Bed in One Day?
- Managing Organic Soil Nutrients: The 3-Year Plan for Self-Sufficiency
Carbon to Nitrogen Ratio: The Secret to Fast In-Situ Composting?
The foundation of creating fertility, rather than buying it, lies in understanding a single, critical principle: the carbon-to-nitrogen (C:N) ratio. This isn’t just academic; it’s the master control for your garden’s decomposition engine. The microorganisms that form your soil food web require a balanced diet to work efficiently. They use carbon (brown materials like dried leaves, cardboard, and wood chips) for energy and nitrogen (green materials like grass clippings, kitchen scraps, and manure) for protein synthesis and reproduction. Get this balance right, and you create a rapid decomposition process that generates rich humus. Get it wrong, and you end up with a slimy, smelly mess or a dry, inactive pile.
The goal is to achieve a blend that provides the perfect meal for your microbial workforce. While recipes for compost piles are common, the true ecosystem architect applies this principle directly in the garden beds. This is « in-situ composting, » where you are constantly layering brown and green materials as mulch, creating a slow-release feast for the soil food web right where the plants need it. For more active decomposition, research shows the ideal C:N ratio is between 25:1 and 35:1. This translates to roughly two to four parts « browns » to one part « greens » by volume. Learning to see your yard waste through this lens—seeing dried stalks as carbon and fresh weeds as nitrogen—is the first step toward building a closed-loop system.
The ultimate goal is to generate rich, dark humus teeming with life, the very foundation of a self-sustaining garden.
This final product is a testament to a well-managed nutrient cycle. You can develop a sensory diagnostic: if the material smells sour like ammonia, it’s too high in nitrogen and needs more carbon. If it’s dry and inactive, it’s likely high in carbon and needs a boost of nitrogen-rich greens and moisture. Mastering this balance allows you to create fertility on demand, from materials you already possess.
Chop-and-Drop: Is It Messy or the Ultimate Fertilizer technique?
The « chop-and-drop » method is the most direct application of nutrient cycling in a garden. It is the simple act of cutting plant material—leaves, stems, and flowers—and letting it fall directly onto the soil surface to decompose in place. While some may see it as messy, the ecosystem architect recognizes it as an incredibly efficient, labor-saving technique for building soil fertility. Instead of gathering, moving, turning, and redistributing compost, you are feeding the soil food web exactly where your plants are growing, creating a self-mulching system.
This technique mimics the natural process of a forest floor, where falling leaves and debris constantly build the topsoil layer. By strategically planting « biomass producers »—fast-growing plants with high nutrient content—you create an on-site fertilizer factory. When you chop this material, you are releasing the nutrients it has accumulated back to the soil surface, making them available for neighboring plants. It also forms a protective mulch layer that suppresses weeds, retains soil moisture, and moderates soil temperature. According to the University of Missouri Extension, even simple grass-cycling can reduce a lawn’s nitrogen fertilizer needs by up to 25%. Applying this to a diverse garden bed yields even greater benefits.
Case Study: Geoff Lawton’s Jordan Desert Food Forest
To see the power of chop-and-drop in an extreme environment, look no further than the work of permaculture designer Geoff Lawton. He demonstrated the method’s incredible effectiveness by creating a thriving oasis in the harsh conditions of the Jordan desert. By planting fast-growing, nitrogen-fixing species and dynamic accumulators, he established a system. The technique involved regularly cutting this biomass and dropping it directly onto the sandy soil. This practice was instrumental in building organic matter, retaining precious moisture, and kickstarting a living soil ecosystem, proving that chop-and-drop can build fertility even in the world’s most challenging climates.
The key is choosing the right plants and managing them. This isn’t about letting a garden run wild; it’s about a purposeful and active process of cutting, dropping, and regenerating. It is the embodiment of a closed-loop system, turning potential « waste » into an invaluable resource without it ever leaving the garden bed.
The Import Risk: Why Buying Topsoil Threatens Your Ecosystem?
The instinct when starting a new garden bed is often to buy and import soil or compost. It feels like a shortcut to fertility, but for the ecosystem architect, it represents a significant risk and a philosophical breach. Bringing external soil into your garden is an open invitation to importing problems you don’t have, such as persistent weed seeds (like bindweed or nutgrass), soil-borne diseases, and unseen pests. More alarmingly, you have no control over the history of that soil.
Commercially available topsoil and « garden soil » blends can be sourced from unknown locations, including construction sites or agricultural fields with a history of chemical use. These can carry residues that harm the delicate soil food web you are trying to cultivate. As researchers have pointed out, the unseen dangers can be significant. In a 2021 study, experts warned about this exact issue. As Alengebawy et al. state in the Toxics Journal:
Heavy metals and pesticides toxicity in agricultural soil and plants pose ecological risks and human health implications through bioaccumulation and transmission pathways.
– Alengebawy et al., Toxics Journal, 2021
Building your soil in place, using the materials from your own property, is the only way to ensure a clean, healthy, and resilient foundation. This means working with the soil you have and improving it over time with organic matter you generate. Before you can improve it, you must understand it. A simple soil health audit can give you a baseline of your starting point, turning you from a passive consumer into an active observer and partner with your land.
Your DIY Soil Health Audit Checklist
- Earthworm Count Test: Dig a 12x12x12 inch hole in moist soil. Healthy, biologically active soil should contain at least 10 earthworms. Fewer than this indicates a lack of organic matter or potential compaction issues.
- Water Infiltration Test: Clear a small area of the soil surface and pour a quart of water onto it. It should be fully absorbed within 10-30 seconds. If it pools for longer, your soil may have poor structure or compaction.
- Smell Test: Take a handful of moist soil and smell it. Healthy soil has a rich, earthy, fresh scent. Sour, ammonia, or metallic odors indicate an imbalance, likely anaerobic conditions or contamination.
- Soil Structure Test: Squeeze a handful of moist (not wet) soil into a ball. A good structure will form a ball that holds its shape but crumbles easily when you poke it. If it’s hard as a rock or won’t form a ball, your structure needs improvement.
- Color Assessment: Observe the color of your topsoil. A rich, dark brown or black color indicates high organic matter content, which is the engine of fertility. Pale, gray, or reddish colors suggest depletion.
Comfrey and Cardoon: Growing Your Own Mulch in a Corner?
To achieve true fertility independence, you must have a reliable source of organic matter. Instead of looking outward, the ecosystem architect looks to a dedicated corner of the garden. This is where « dynamic accumulators » come into play. These are plants with deep taproots that act as biological miners, drawing up minerals and nutrients from deep in the subsoil where other plants can’t reach. They then store these nutrients in their fast-growing leaves. When you chop and drop this foliage, you are effectively bringing deep-earth minerals to the surface and making them available to your entire garden.
Russian Comfrey (Symphytum x uplandicum) is the undisputed champion in this category. Its deep roots pull up vast quantities of potassium, calcium, and other trace minerals. It is so effective that field trials at Unadilla Community Farm showed that Russian comfrey exceeded thresholds for potassium and silicon even when grown in poor, unamended soil. A single plant can be harvested up to five times a year, producing an enormous amount of nutrient-rich « biomass » to be used as mulch, a compost activator, or to make a liquid fertilizer tea. Cardoon, with its large, silver leaves, is another excellent biomass producer. By dedicating a small, out-of-the-way patch to these fertility powerhouses, you create a perpetual, on-demand source of mulch and fertilizer.
These plants are not just grown; they are managed as a crop for fertility. However, they are not the only options. A diverse range of plants can serve this function, each bringing its own unique set of benefits to the garden ecosystem.
The following table, based on findings from institutions like Cornell University, compares several effective dynamic accumulator plants, helping you choose the right fertility-builders for your specific garden needs and climate.
| Plant Name | Key Nutrients Accumulated | Growth Speed | Family-Friendly Features | Containment Need |
|---|---|---|---|---|
| Russian Comfrey | Potassium, Silicon, Calcium | Fast (5 cuts/year) | Non-toxic, deep taproot mines minerals | High – use barriers |
| Dandelion | Phosphorus, Copper, Potassium | Very Fast | Edible flowers, self-seeding | Low – easy to manage |
| Red Clover | Nitrogen (N-fixing legume) | Medium-Fast | Attracts pollinators, beautiful blooms | Low |
| Borage | Calcium, Potassium | Fast | Edible blue flowers, bee magnet | Medium – self-seeds |
| Sunflower | Phosphorus, Magnesium | Fast | Edible seeds, strong stalks for structure | Low |
| Lambsquarters | Potassium (exceeds threshold) | Very Fast | Edible greens, nutrient-dense | Low – annual |
When to Stop Inputs: How Long Before a Garden Balances Itself?
The journey to a self-sustaining garden is not a single event but a gradual process of ecological succession. A key question for the aspiring ecosystem architect is: « How do I know when I’ve arrived? » The goal is to reach a state of dynamic equilibrium where the garden’s internal nutrient cycles are robust enough to support vigorous plant life with minimal to no external inputs. This doesn’t happen overnight, but over several seasons, you will begin to see clear signs that your system is maturing.
The first and most obvious indicator is a change in the soil itself. It will become darker, more crumbly, and hold moisture for longer after watering. You’ll notice this means you need to water less frequently, as the increased organic matter acts like a sponge. Another powerful sign is the presence of a bustling underground community. High populations of earthworms become visible every time you dig, their castings naturally aerating and enriching the soil. Above ground, the ecosystem’s maturity is reflected in its biodiversity. You will observe an abundance of beneficial insects—more pollinators like bees and hoverflies, and more predators like ladybugs and lacewings, which keep pest populations in check naturally.
As the system matures, you will also notice a significant reduction in effort required from you. The deep mulch layers and dense planting will naturally suppress most weeds, drastically reducing the need for constant weeding. Perhaps the most rewarding sign is when your plants begin to take over the work of propagation. The appearance of volunteer seedlings—tomatoes, dill, or calendula popping up on their own—is a clear signal that your soil is fertile and the conditions are stable enough to support new life without your intervention. Finally, the ultimate proof is in the plants’ vigor. When your vegetables and flowers grow strong with deep green foliage year after year with little more than a top-dressing of your own compost or mulch, you’ll know your system is truly starting to sustain itself.
Mustard or Phacelia: Which Green Manure Fixes More Nitrogen?
The question in the title is a trick, but a vital one for the ecosystem architect. The common belief is that all « green manures » or « cover crops » add nitrogen to the soil. This is a dangerous oversimplification. Only a specific class of plants, legumes (like clover, vetch, and peas), have a symbiotic relationship with rhizobia bacteria that allows them to « fix » atmospheric nitrogen and make it available in the soil. Neither mustard nor phacelia are legumes; therefore, neither of them fixes nitrogen. So why are they so highly valued in sustainable systems?
The answer lies in moving beyond a single-nutrient mindset. A healthy ecosystem is about more than just nitrogen. Mustard and phacelia are brilliant tools for other critical functions. As the comparison table below shows, their strengths are diverse. Mustard, a brassica, is prized for its role as a biofumigant. When its tissues are chopped and incorporated into the soil, they release compounds that suppress certain soil-borne pathogens and nematodes. Its strong taproot also works wonders for breaking up compacted soil. Phacelia, on the other hand, is known as a « biomass king » and a « bee magnet. » It grows incredibly fast, producing a huge amount of organic matter to build soil structure, and its beautiful flowers are an unparalleled food source for a wide range of native pollinators.
| Characteristic | Mustard (Brassica spp.) | Phacelia (Phacelia tanacetifolia) |
|---|---|---|
| Nitrogen Fixation | Non-legume – does NOT fix nitrogen | Non-legume – does NOT fix nitrogen |
| Primary Soil Benefit | Biofumigation (suppresses soil pathogens), breaks up compaction | Rapid biomass production, improves soil structure |
| Pollinator Attraction | Moderate – yellow flowers attract some bees | Excellent – blue flowers are bee magnets, supports 20+ bee species |
| Growth Speed | Very fast (6-8 weeks to flowering) | Fast (8-10 weeks to flowering) |
| Weed Suppression | Excellent – quick canopy, allelopathic properties | Good – dense growth shades soil |
A holistic view is essential. As the Treeyopermaculture Educational Handbook notes, a plant’s value is multifaceted:
Mustard and phacelia should be compared not just on nitrogen fixation, but on their ability to attract pollinators, suppress weeds, and provide habitat for beneficial insects—all crucial for a self-sustaining system.
– Permaculture Design Course, Treeyopermaculture Educational Handbook
The smartest strategy is to use them in combination. Plant a mix that includes a legume for nitrogen (clover), a biofumigant for cleansing (mustard), and a biomass producer for structure and pollinators (phacelia) to create a truly multifunctional green manure cocktail.
Cardboard and Compost: How to Convert a Lawn to a Bed in One Day?
One of the biggest barriers to creating a productive garden is the lawn. A conventional lawn is an ecological desert, and the traditional method of removing it—stripping the sod—is labor-intensive and destructive, removing the most fertile layer of topsoil. The ecosystem architect uses a far more elegant, efficient, and regenerative method known as sheet mulching or « lasagna gardening. » This no-dig technique allows you to convert a patch of lawn into a rich, plant-ready garden bed in a single afternoon, all while building soil fertility from day one.
The process works by smothering the existing grass and weeds while simultaneously creating the layered conditions for a new, vibrant soil ecosystem. The base layer of cardboard blocks sunlight, killing the grass beneath it, while also providing a slow-release source of carbon and attracting earthworms who love the dark, moist environment. Above this, you simply layer « green » (nitrogen-rich) and « brown » (carbon-rich) materials, just like making a compost pile, but directly in place. This layered approach is highly effective, with community farm projects showing it can break down into soft, nutrient-rich soil within a couple of months, preserving the existing topsoil while building new organic matter on top.
The beauty of this method is its immediacy. You can plant directly into the top layer of compost right away, allowing you to get growing while the layers below decompose and build your future soil. Here is a step-by-step guide to your one-day lawn conversion project:
- Outline and Mow: Mark your new bed’s shape on the lawn with a hose or stakes. Mow the grass within the outline as short as possible, leaving the clippings in place as your first nitrogen layer.
- Lay the Foundation: Cover the entire area with overlapping, plain brown cardboard. Be sure to remove all plastic tape and glossy labels. Wet the cardboard thoroughly to kickstart decomposition and help it conform to the ground.
- Layer the Greens: Add a 2-3 inch layer of nitrogen-rich materials. This can be more grass clippings, kitchen scraps, or fresh manure.
- Layer the Browns: Cover the green layer with a 4-6 inch layer of carbon-rich materials, such as dried leaves, straw, or shredded paper. This balances the nitrogen and prevents odors.
- Top with Compost: Add a final 3-4 inch layer of finished compost. This is your immediate planting medium.
- Mulch and Plant: Finish with a 2-inch layer of straw or wood chip mulch to retain moisture, and then plant your transplants (like tomatoes or kale) directly into the top compost layer.
You have just replaced a sterile patch of lawn with a dynamic, soil-building, food-producing machine.
Key Takeaways
- Build, Don’t Buy: True self-sufficiency comes from creating your own soil fertility in place, not importing it in bags. This eliminates risks and closes the resource loop.
- Plants Are Tools: Learn to see plants for their function. Some are for food, but others are for mining nutrients (comfrey), fumigating soil (mustard), or producing biomass (phacelia).
- Orchestrate a System: Your role is to become an ecosystem architect. Master the C:N ratio, layer organic matter, and observe your garden’s feedback to guide it toward a state of dynamic equilibrium.
Managing Organic Soil Nutrients: The 3-Year Plan for Self-Sufficiency
Transforming a dependent garden into a self-reliant ecosystem is a marathon, not a sprint. It requires a strategic, patient approach that unfolds over several seasons. As the ecosystem architect, your role is to guide this evolution with a clear plan. This three-year journey is a blueprint for systematically building soil, establishing nutrient cycles, and weaning your garden off all external inputs. Each year builds upon the last, leading to a state of mature, closed-loop fertility.
This plan is not a rigid prescription but a flexible framework. The core idea is to shift from large-scale interventions in Year 1 to fine-tuning and harvesting from a mature system in Year 3. It’s a phased transition from gardener to true ecosystem manager.
Year 1: The Foundation Year
This year is all about building the base. The primary goal is to maximize organic matter input and initiate the decomposition processes. Sheet mulch any lawn areas you intend to convert to garden beds. Start your first large, active compost pile, diligently collecting all kitchen scraps and yard waste. This is the year to plant « pioneer » species like potatoes (which aerate the soil) and sunflowers (whose deep roots begin to break up compaction). Most importantly, this is the year of observation. Use the soil health audit to establish a baseline. Note where water pools, which areas get the most sun, and what insects are already present. You are gathering the critical data needed for future design decisions.
Year 2: The Growth and Connection Year
With the foundation laid, Year 2 is about establishing the living machinery of your ecosystem. Plant your dynamic accumulators (comfrey, borage, clover) in their dedicated fertility patches. Begin a regular chop-and-drop routine with all garden trimmings, returning this biomass directly to the soil surface. This is the year to introduce more complex plant guilds, interplanting companions that support each other. By now, your first compost pile should be ready, and its application will supercharge your soil’s biological activity. Your goal this year is to establish the key feedback loops and reduce purchased fertilizer inputs by at least 50%, relying instead on your own compost and freshly chopped mulch.
Year 3: The Maturity and Harvest Year
By the start of Year 3, you should see a dramatic difference in your garden’s vitality. This year is about fine-tuning and reaping the rewards. Your dynamic accumulators are now fully established and can be harvested 4-5 times for mulch. Your soil structure should be vastly improved, requiring less water and weeding. External inputs should be reduced to almost zero, used only for spot-treatments if necessary. The primary goal is to achieve a fully closed-loop system where all garden « waste » is cycled back into fertility. Your new role is to monitor the system, make small adjustments, and harvest not only food, but also the compost and mulch needed to sustain the entire system for the years to come. This is the year you teach a friend or neighbor how to start their own journey, spreading the knowledge and resilience.
Your journey to a truly closed-loop garden starts today. Begin by auditing your soil’s health and planning your Year 1 foundation. You now have the blueprint to stop being a consumer of fertility and become a true ecosystem architect.