In summary:
- When temperatures pass 30°C, your garden’s survival depends on rapid, intelligent action, not just more water.
- Effective shading, smart watering timing, and the right mulch are your three most powerful tools for immediate thermal triage.
- Reviving heat-stressed plants involves understanding the difference between temporary and permanent wilting before you act.
- Long-term survival in hotter UK summers requires shifting from panic response to designing for climate resilience.
The Met Office issues a red warning for extreme heat, and a familiar sense of panic sets in for UK gardeners. The lawn is crisping, the leaves on the tomatoes are curling, and the hanging baskets look defeated by midday. The usual advice— »water more »—feels hopelessly inadequate when the sun is relentlessly baking the soil and temperatures climb towards, and even past, 30°C. We frantically move pots, douse everything in sight, and hope for the best, often wondering if we’re doing more harm than good.
Most guides will tell you to add mulch and provide shade. While correct, this advice often misses the critical « how » and « why. » It doesn’t explain the physics of heat stress on a plant’s roots or the crucial difference between a plant that’s temporarily fainting in the heat and one that has passed the point of no return. It fails to address the urgent reality of improvising life-saving measures with what you have on hand, turning a garden into a plant-sized emergency room.
But what if the key to saving your garden isn’t just about frantic damage control, but about understanding the science of heat and water? What if this crisis could become a lesson in thermal triage and long-term resilience? This guide moves beyond the platitudes. We will not just tell you to water; we will explain when watering is a lifeline and when it risks causing new problems. We won’t just say « add shade »; we’ll show you how to improvise it effectively. It’s time to shift from heatwave panic to proactive protection.
This article provides a structured emergency response plan. We will begin by diagnosing the problem, then move to immediate life-saving interventions for shading and watering, explore the best materials for protecting the soil, and finally, look at the long-term strategies that will make your garden not just survive, but thrive in our new climate reality.
Summary: Heatwave Red Alert: A UK Gardener’s Emergency Guide to Saving Your Plants
- Temporary vs Permanent Wilting: When Has a Plant Gone Too Far?
- Fleece or Sheets: Improvising Shade During a Red Warning?
- Morning or Evening: When Does Watering Risk Scorch or Mold in Heat?
- Straw vs Bark: Which Mulch Reflects Heat Best?
- The Dunking Method: Rehydrating Dried Out Pots That Repel Water?
- Why Gravel Gardens Handle Both Deluge and Drought Best?
- Plants for 2030: Selecting Species for Hotter, Drier Summers
- Designing for Climate Resilience: Gardens That Survive Flood and Drought
Temporary vs Permanent Wilting: When Has a Plant Gone Too Far?
The first sign of heat stress is the most dramatic: wilting. A plant that was proud and upright in the morning is suddenly limp and defeated by 3 PM. But before you declare it lost, you must perform a quick thermal triage. Not all wilting is a death sentence. Plants often engage in temporary wilting as a self-preservation tactic during the hottest part of the day. They deliberately allow their leaves to droop to reduce the surface area exposed to the sun, conserving water loss through transpiration. As temperatures cool in the evening, a temporarily wilted plant will often perk back up on its own, especially if the soil is moist.
Permanent wilting, however, is a critical condition. This occurs when the plant’s cells have lost so much water they can no longer regain their turgidity, even if water becomes available. The soil has reached the « permanent wilting point, » a state of dryness so extreme that the plant cannot extract the remaining moisture. If a plant is still limp and floppy in the cool of the early morning, after the soil has been watered, it is a serious red flag. This indicates the roots may be damaged or the plant’s vascular system has failed.
Field Test: The Morning-After Assessment
A practical way to distinguish the two is the ‘morning-after’ test. If you find a wilted plant in the afternoon, give its soil a thorough watering in the evening. If it has recovered and looks turgid by the next morning, it was only temporary wilting and no lasting harm was done. If it remains limp, the situation is dire. As a final check before composting, perform the ‘scratch test’: use your fingernail to scrape a tiny section of bark from a main stem. If the layer underneath is green and moist, the plant is still alive and may yet recover with intensive care. If it’s brown and dry, it has likely succumbed to permanent wilting.
Understanding this difference is the first and most crucial step in any heatwave response. It prevents you from giving up on a plant that is merely protecting itself and helps you focus your precious water and energy on those that can still be saved. It’s the difference between being a panic-stricken waterer and a calculated garden medic.
Fleece or Sheets: Improvising Shade During a Red Warning?
When a heatwave strikes, direct, scorching sun is your plant’s number one enemy. The goal is to create a ‘sunscreen’ for your garden, reducing the intensity of the solar radiation hitting the leaves and, just as importantly, the soil. While professional-grade shade cloth is the ideal solution, an emergency calls for creative improvisation. Anything from old white bedsheets, horticultural fleece, or even large pieces of cardboard can be deployed to create life-saving shade.
The key principle is to create a barrier that filters sunlight without trapping heat. This is why a dark-coloured tarp is a terrible choice; it absorbs heat and radiates it downwards, effectively cooking the plants beneath. Light-coloured fabrics like white sheets are far better as they reflect a significant portion of the sunlight. Professional shade cloth is even more effective because its woven design allows hot air to rise and escape, with research showing it can lower temperatures beneath by as much as 10-15°F. When improvising, ensure there is an air gap between the fabric and the plants. Draping a wet sheet directly onto foliage can lead to scalding as the fabric heats up.
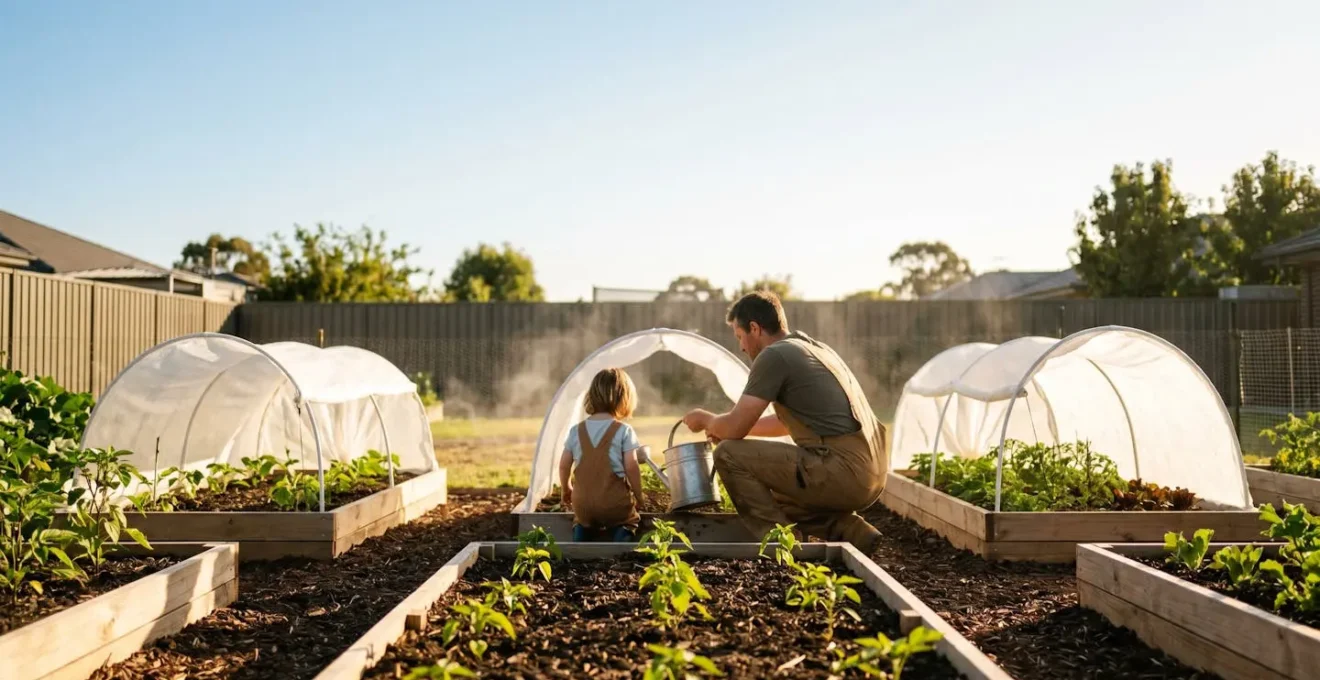
This paragraph introduces the concept of improvised shading. For a visual example of how to create a simple and effective structure, see the illustration below. This setup keeps the fabric elevated, ensuring crucial airflow.
As you can see, creating shade is a perfect family activity. Using simple stakes, bamboo canes, or even lawn chairs, you can build a frame over vulnerable plants and beds. Secure the fabric with clothes pegs or clips. The aim is to shield plants, especially vegetables like tomatoes and lettuces, during the most intense period of sun, typically from 11 AM to 4 PM. This simple act of sun-screening can make the difference between a harvest and a heap of scorched leaves.
Morning or Evening: When Does Watering Risk Scorch or Mold in Heat?
In a heatwave, the instinct is to water, water, water. But *when* you water is just as important as *if* you water. The long-standing debate among gardeners—morning or evening—becomes critical when temperatures soar. The scientific consensus is clear: early morning is the undisputed champion for watering during extreme heat. Watering between 5 AM and 9 AM gives the water time to penetrate deep into the soil and be absorbed by the roots before the sun’s intensity causes rapid evaporation. It fills the « gas tank » for the day ahead, preparing the plant to withstand the stress to come.
What about the common fear that watering in the midday sun will scorch leaves? This is largely a myth. Sunburn on foliage is caused by overexposure to intense UV light, not by water droplets acting like tiny magnifying glasses. However, midday watering is incredibly inefficient, as a large percentage of the water evaporates before it even reaches the root zone. Evening watering, while better than midday, carries its own risks, particularly in the UK’s often-humid climate. When foliage remains wet overnight in warm conditions, it creates the perfect breeding ground for fungal diseases like powdery mildew and blight. Slugs and snails also relish these damp conditions.
Debunking the Watering Myths
As horticultural science communicators like Garden Betty explain, the real danger is not midday scorch but evening fungi. While early morning is optimal, the golden rule in a severe heatwave is that any water is better than no water. If you miss the morning window and a plant is in critical distress in the afternoon, do not wait. Water it immediately, focusing the water directly at the base of the plant to minimize evaporation and keep the leaves as dry as possible.
Optimal watering time is in the early morning; watering during the day increases evaporative losses, and evening watering regimes can encourage establishment of some fungal pathogens.
– Linda Chalker-Scott, Ph.D., Extension Horticulturist, Washington State University
Therefore, the strategy is adaptive. Aim for a deep, thorough watering in the early morning. If a specific plant shows severe wilting in the afternoon, provide emergency water at the roots. Avoid routine evening watering to reduce the risk of creating a haven for pests and diseases. This is the core of smart hydration physics for your garden.
Straw vs Bark: Which Mulch Reflects Heat Best?
If shading is the plant’s sun-hat, mulch is the soil’s protective blanket. A thick layer of organic material spread over the soil surface is one of the most effective tools in your heatwave arsenal. It performs two critical functions: it slows down the evaporation of precious moisture from the soil, and it insulates the soil, keeping the plant’s delicate root system cooler. But with so many options at the garden centre—bark, straw, wood chips, gravel—which one is the best for reflecting heat?
The answer lies in simple physics: colour and texture. Light-coloured materials reflect sunlight and therefore heat, while dark materials absorb it. This makes pale-coloured mulches like straw or light-coloured wood shavings superior for heat reflection. Dark bark mulches, while excellent for moisture retention, will absorb more heat at the surface. However, a thick enough layer (2-4 inches) will still keep the soil beneath it significantly cooler than bare earth. The texture also matters; an airy mulch like straw allows for some air circulation, while a dense mulch like bark creates a more solid barrier against evaporation.
The choice of mulch depends on your garden’s specific needs—the food garden has different requirements from a decorative shrub border. The following table provides a clear comparison of common mulch types and their performance in hot weather.
| Mulch Type | Heat Reflection | Moisture Retention | Application Depth | Best For |
|---|---|---|---|---|
| Straw | High (pale color reflects sunlight) | Medium (airy structure) | 4-6 inches in vegetable beds | Food gardens, regions without slugs |
| Bark/Wood Chips | Medium (darker colors absorb more heat) | High (dense layer reduces evaporation) | 2-4 inches | Ornamental beds, around trees and shrubs |
| Pine Needles (Pine Straw) | Medium-High (light brown color) | Medium (allows water penetration) | 2-3 inches | Decorative areas, slopes (prevents erosion) |
| Light-Colored Stones/Gravel | Very High (white reflects maximum sunlight) | Low (no moisture retention) | 1-2 inches | Heat-loving Mediterranean plants, decorative accents |
As this comparative analysis demonstrates, there is no single « best » mulch; there is only the best mulch for a specific situation. For protecting the roots of your precious tomatoes and beans, a thick layer of light-coloured straw is an excellent choice. For keeping the soil around your established shrubs and perennials moist and cool, a layer of bark or wood chips is a durable and effective option. Applying mulch *before* a heatwave arrives is a proactive step that will pay huge dividends.
The Dunking Method: Rehydrating Dried Out Pots That Repel Water?
Container plants are the first casualties in a heatwave. Their limited soil volume heats up and dries out with alarming speed. A particularly frustrating phenomenon occurs when a pot becomes so dry that the soil actually starts to repel water. You’ll see water pooling on the surface or running straight down the sides and out the bottom, leaving the root ball almost completely dry. This is known as hydrophobic soil, a condition where the organic matter in the potting mix develops a waxy coating that prevents water absorption.
This is the soil’s « thirst-trap »—it looks like it’s getting a drink, but it’s dying of thirst. At this point, surface watering is useless. The only effective solution is a complete rehydration technique known as the « dunking method. » It’s a simple but profoundly effective way to break the hydrophobic barrier and force the soil to accept water again. This method uses prolonged contact to ensure every particle of soil becomes fully saturated.
The Science of Hydrophobic Soil
Why does this happen? Agricultural monitoring research explains that when peat-based compost dries out completely, the organic particles shrink and develop a waxy residue. This creates a high surface tension that water cannot easily penetrate. The soil has effectively reached its permanent wilting point, where soil tension can exceed -1.5 MPa. The dunking method overcomes this by using the principle of immersion, allowing water the time it needs to break down that waxy coating and re-saturate the soil from the bottom up.
For any gardener with pots, mastering this technique is non-negotiable for surviving a heatwave. It can bring a plant that looks completely lost back from the brink. Follow this simple action plan to execute the method perfectly.
Your Action Plan: Reviving Water-Repellent Soil
- Identify: Find pots where water runs straight through or pools on the surface without being absorbed. This is the key symptom of hydrophobic soil.
- Prepare the Bath: Fill a basin, bucket, or sink with enough room-temperature water to submerge the entire pot up to its rim.
- Submerge and Observe: Gently lower the pot into the water. You will immediately see a stream of air bubbles rising from the soil. This is a good sign—it’s the trapped air being replaced by water.
- Soak Until Still: Let the pot soak until the bubbling stops completely. This can take anywhere from 15 minutes to over an hour for very dry pots. The cessation of bubbles is your indicator that the soil is fully rehydrated.
- Drain Thoroughly: Once the bubbling has ceased, carefully lift the pot out of the water and place it somewhere to drain freely for at least 30 minutes. The pot will be very heavy.
- Resume Normal Care: Return the plant to a shaded spot to recover and monitor its moisture levels more frequently to prevent it from drying out so severely again.
Why Gravel Gardens Handle Both Deluge and Drought Best?
As the UK’s weather becomes more extreme, swinging from periods of intense drought and heat to sudden, heavy downpours, gardeners are looking for more resilient design solutions. One of the most effective is the gravel garden. Often associated with Mediterranean or arid landscapes, the principles of gravel gardening offer a powerful solution to the dual challenges of both deluge and drought. It’s a design that embodies climate resilience.
The genius of the gravel garden lies in its layered structure. During a torrential downpour, the gravel layer allows water to pass through it instantly and drain away freely, preventing the waterlogging that suffocates roots in a traditional soil-heavy border. This superior drainage is a lifeline during the flash floods that can follow a dry spell. But during a drought, that same layer of gravel performs a completely different, equally vital role. It acts as a highly effective and durable mulch.
The Dual-Function Design
Climate-resilient gardening research shows the gravel’s power. It shades the soil surface from the sun, keeping it significantly cooler and dramatically reducing moisture loss through evaporation. The stones act as a physical barrier, trapping moisture in the soil below where plant roots can access it. This dual-function design—excellent drainage in the wet, excellent moisture conservation in the dry—makes gravel gardens uniquely suited to our increasingly erratic weather patterns. It’s not about creating a barren rock garden; it’s about using gravel as a functional matrix for tough, beautiful, drought-tolerant plants.
You can even experiment with these principles on a small scale as a family project. Creating a miniature gravel garden in a tray is a fantastic way to observe these dynamics first-hand.
- Select a Base: Use a shallow tray or container, about 12-18 inches deep.
- Drainage Layer: Add a bottom layer of larger stones to ensure water can escape.
- Soil Layer: Add a middle layer of sandy, gritty compost mix for the plant roots.
- Gravel Mulch: Top with a 1-2 inch layer of decorative gravel.
- Plant ‘Superhero’ Species: Choose small, drought-tolerant plants like Sempervivums (houseleeks) or Sedums.
- Test Its Powers: Water it heavily and watch how quickly it drains. Then, leave it in the sun and observe how long the soil underneath the gravel stays moist.
Plants for 2030: Selecting Species for Hotter, Drier Summers
Emergency measures can save your garden through a heatwave, but true climate resilience means adapting your planting strategy for the long term. The reality is that the summers of the 2030s are predicted to be hotter and drier. The plants that struggled this year will likely struggle even more in the future. The most sustainable action you can take is to start gradually incorporating drought-tolerant « superhero » plants that are naturally equipped to handle heat and low water conditions.
This doesn’t mean your garden has to look like a desert. There is a rich palette of beautiful plants from Mediterranean climates and other dry regions that thrive in the very conditions that cause others to fail. These plants have evolved incredible adaptations: silvery leaves that reflect sunlight (like Lamb’s Ear), waxy coatings that reduce water loss (like Sedums), and deep root systems that can find moisture far below the surface (like Yarrow). Integrating these plants into your borders is a step towards a less stressful, more sustainable garden.
This is a wonderful opportunity for family gardening, introducing children to plants that are not just beautiful but also incredibly tactile and sensory. Here are some interactive, drought-tolerant plants that are perfect for a children’s or sensory garden.
As this image captures, the joy of discovery is a powerful teacher. Plants like these turn the garden into a living classroom.
- Lamb’s Ear (Stachys byzantina): Its incredibly fuzzy, silvery leaves are irresistible to touch and are a built-in sun-reflector.
- Lavender: The fragrant flowers are a delight for the senses and attract bees and butterflies for observation. It’s famously tough in heat.
- Rosemary: This aromatic herb releases a wonderful scent when brushed against and is virtually indestructible in sun and drought.
- Ornamental Grasses (e.g., Festuca glauca): They create movement and a gentle rustling sound in the wind, adding an auditory dimension.
- Sedum (Stonecrop): With their thick, fleshy leaves that store water, they are a visible lesson in drought adaptation. Children can easily propagate them by breaking off a piece.
- Yarrow (Achillea): Its flat flower heads are perfect landing pads for insects, and its feathery foliage is soft and resilient.
By choosing plants adapted to the future climate, you reduce your garden’s reliance on watering, decrease your own stress levels, and create a more resilient and fascinating ecosystem.
Key Takeaways
- Immediate heatwave survival relies on three key actions: effective shading, smart watering (early morning), and insulating the soil with mulch.
- Long-term garden health in a changing climate depends on proactive design choices, such as using gravel for drainage and moisture retention.
- The most resilient gardens are those planted with species naturally adapted to heat and drought, reducing future water needs and maintenance.
Designing for Climate Resilience: Gardens That Survive Flood and Drought
Surviving this year’s heatwave is a victory, but the ultimate goal is to create a garden that is inherently resilient, one that can withstand the future shocks of our changing climate with grace and less intensive intervention from you. This means shifting your mindset from being a reactive plant-medic to a proactive garden architect. It’s about making deliberate design choices that work with nature, not against it, to build a self-sufficient and robust ecosystem.
This involves putting all the pieces we’ve discussed together into a coherent strategy. It means choosing the right plant for the right place—placing those few water-loving plants in a low spot that naturally collects rain, while dedicating the hot, dry, sun-baked spots to the drought-tolerant superheroes. It means committing to mulching not as an emergency measure, but as a standard annual practice. It means thinking about surfaces—replacing a patch of struggling lawn with a beautiful gravel bed or a tapestry of low-maintenance groundcover.
The Family Garden Journal: A Tool for Adaptation
One of the best ways to build this resilience is to become an observer. The Natural Learning Initiative encourages a simple but powerful tool: the family garden journal. This transforms climate challenges into learning opportunities. After a heatwave, document what survived and what thrived. Note which parts of the garden dried out fastest. Children can draw pictures of the « superhero plants » or take photos of your shading experiments. This journal becomes your family’s personalized guide to climate adaptation, building on real-world results from your own patch of earth.
Creating a « Family Garden Charter » can be a fun way to codify these principles and commit to them together. It’s a promise you make to your garden and to each other to become more observant, more adaptable, and more resilient gardeners. This isn’t about creating a perfect, maintenance-free space, but a living, learning landscape that can weather the storms—and the heatwaves—to come.
By shifting from reaction to resilience, you not only protect your plants but also create a more sustainable, enjoyable, and educational garden for the whole family, ready for the challenges of 2030 and beyond. Start today by choosing one area to improve—add a layer of mulch, select one drought-tolerant plant for a pot, or simply start a journal. Your future garden will thank you.