In summary:
- Assess, Don’t Guess: Before you cut, understand your shrub’s health. Use simple tests to tell if a branch is truly dead or just dormant for the winter.
- Follow the 1/3 Rule: The secret to reviving an old shrub without killing it is patience. Remove only one-third of the oldest stems each year over three years for a total reset.
- Work with Nature, Not Against It: Learn the ‘plant logic’ behind timing, tool hygiene, and how a plant heals itself to make confident, effective cuts that encourage vibrant new growth.
Inheriting a garden can be a joy, but that joy often comes with a daunting challenge: the massively overgrown, woody shrub. It sits in the corner like a tangled puzzle, leaving you wondering where to even begin. The common advice feels contradictory and terrifying. Cut it too much, and you might kill it. Do nothing, and it gets worse every year. This fear of making a fatal mistake leads to paralysis, while the plant’s health continues to decline.
Most guides offer a simple list of rules: « prune in winter, » « clean your tools, » « remove a third of the growth. » While not incorrect, these instructions lack the most crucial element: the ‘why’. They don’t explain the simple plant biology that makes these rules work. But what if the key wasn’t just memorizing rules, but understanding the plant’s perspective? What if you could learn to « think like a plant, » turning pruning from a frightening chore into a confident, restorative process?
This is precisely our approach. We’re going to move beyond arbitrary rules and delve into the practical science of restorative pruning. This guide is structured to give you not just the ‘how,’ but the foundational ‘why’ behind each action. We will explore a safe, multi-year strategy for renewal, understand the critical importance of timing for different species, and learn the techniques that work *with* your plant’s natural healing abilities. Prepare to transform that overgrown behemoth into a healthy, beautiful feature of your garden.
In the following sections, we will walk through the essential principles of corrective pruning, from foundational rules to advanced techniques, ensuring you have the knowledge and confidence to tackle any neglected shrub.
Summary: Corrective Seasonal Pruning: How to Fix a Neglected Shrub
- The 1/3 Rule: Renewing Old Shrubs Without Killing Them?
- Winter or Summer: When to Prune ‘Bleeders’ Like Acers and Birches?
- The Dirty Tool Mistake That Spreads Canker Between Trees
- Dead or Dormant: The ‘Scratch Test’ Method to Save Healthy Branches
- Sealant or Air: How to Treat Large Pruning Wounds Correctly?
- How to Coppice Shrubs to Force Vibrant New Growth?
- Festooning: Bending Branches to Increase Fruit Buds in Small Spaces?
- Structural Deciduous Shrub Varieties for Winter Interest in Urban Gardens
The 1/3 Rule: Renewing Old Shrubs Without Killing Them?
The single biggest fear when facing a dense, woody tangle is taking too much off and killing the plant. This is where the foundational principle of renewal pruning comes in: the 1/3 rule. This isn’t a vague guideline; it’s a strategic, multi-year plan that respects the plant’s energy reserves and ability to recover. Drastically cutting an old shrub to the ground in one go can be a shock it can’t survive. Instead, we stage the process over three years, ensuring the plant always retains enough established wood to support new growth.
The logic is simple: by removing only a third of the oldest, least productive stems at the base each year, you stimulate the plant to produce fresh, vigorous new shoots from its roots. Meanwhile, the remaining two-thirds of the plant continue to photosynthesize and provide energy. This method systematically replaces the entire framework of the shrub without ever putting its survival at risk. As university extension research confirms, you should never remove more than one-third of the plant material in a single season to maintain its health. This patient approach is the key to a ‘Great Reset’ that brings an old plant back to life.
The three-year cycle looks like this:
- Year 1: In late winter or early spring, identify and remove one-third of the oldest, thickest stems, cutting them right down to the ground. Prioritize any dead, damaged, or crossing branches within this group.
- Year 2: The following year, repeat the process, removing half of the remaining old stems. You will also see new shoots from last year’s cuts; thin these out, keeping only a few of the strongest, best-placed ones.
- Year 3: In the final year, remove the last of the original old wood. Your shrub now has a completely new, younger structure. From now on, an annual light pruning is all that’s needed to maintain its shape and health.
This phased renewal is the most reliable method for renovating a wide variety of multi-stemmed deciduous shrubs like lilacs, forsythia, and viburnum.
By following this structured plan, you replace guesswork with a proven horticultural strategy, ensuring a vibrant, healthy shrub in three years’ time.
Winter or Summer: When to Prune ‘Bleeders’ Like Acers and Birches?
While the general advice is to prune in late winter when plants are dormant, there’s a critical exception for certain species known as ‘bleeders’. Trees and shrubs like maples (Acer), birches (Betula), and walnuts (Juglans) have a unique internal clock. If pruned in late winter or early spring, they will ‘bleed’ a surprising amount of sap from the cuts. This happens because their ‘plant logic’ is already pushing sap upwards from the roots to fuel impending spring growth. Cutting into them at this time is like opening a tap.
While this sap loss is rarely fatal, it’s unsightly, stressful for the plant, and wastes valuable energy that should be going into producing leaves and flowers. The solution is all about timing. To avoid the sticky mess, the surgical cut on these species must be made at a different time of year. There are two windows of opportunity: either in mid-summer after the leaves have fully developed and hardened, or in late autumn/early winter after the leaves have dropped and the plant is fully dormant.
This visual guide helps to understand the two states of a ‘bleeder’ like a maple.
As you can see, the choice is between a fully dormant winter state and a fully active summer state. The key is to avoid the transitional period in late winter and early spring when the sap is flowing most intensely. For any major structural pruning on these ‘bleeder’ species, summer is often the best choice, as you can also see the full shape of the plant and easily identify any dead or weak branches to remove.
By adjusting your pruning calendar for these specific plants, you work with their natural cycles, conserving their energy and promoting clean, healthy healing.
The Dirty Tool Mistake That Spreads Canker Between Trees
It sounds like basic advice, but failing to properly clean pruning tools is one of the fastest ways to spread devastating diseases through a garden. Think of your pruning shears as a surgeon’s scalpel. You wouldn’t want a surgeon using a dirty instrument on you, and your plants deserve the same consideration. Fungal spores and bacteria that cause diseases like canker, fire blight, and black spot can easily hitch a ride on a dirty blade, turning a simple pruning cut into an entry wound for infection.
The risk is not theoretical. When you cut into a branch, you are creating an open wound. If your tool carries microscopic pathogens from a previously pruned plant, you are effectively inoculating the healthy plant with a disease. In fact, research shows that some vascular pathogens can have a transfer rate as high as 70% from a contaminated tool to a fresh cut. This is why disinfection isn’t just a fussy extra step; it’s a critical part of responsible garden hygiene that protects your investment and prevents a single sick plant from becoming a garden-wide epidemic.
Fortunately, effective disinfection is simple and quick. Creating a « Tool Medicine Kit » can make it a routine part of your gardening practice.
Your Action Plan: Family-Safe Tool Disinfection Protocol
- Prep the Blade: Before disinfecting, use a stiff brush or cloth to physically remove all dirt, sap, and plant debris from your pruning tool’s blades. Disinfectant can’t work effectively through a layer of grime.
- Disinfect: Wipe or dip the clean blades in a solution of 70% isopropyl alcohol (rubbing alcohol). Unlike bleach, it’s less corrosive to your tools and doesn’t require a long soak; immediate contact is effective.
- Frequency: If you are working on a plant you know is diseased, disinfect between every single cut. For general pruning of healthy plants, disinfecting after you finish with each individual shrub is a good practice.
- Safe Storage: After cleaning and disinfecting, ensure your tools are stored in a dry, secure location, away from the reach of children. Protecting the sharp edges is also key for longevity and safety.
- Family Tip: Create a designated « Tool Medicine Kit » with a clearly labeled spray bottle of alcohol and cleaning cloths. Keep it in your garden shed or tool bag so it’s always ready to go.
Making this simple protocol a habit is the single most effective action you can take to prevent the accidental spread of disease and ensure your pruning helps, rather than harms, your plants.
Dead or Dormant: The ‘Scratch Test’ Method to Save Healthy Branches
One of the most common pruning mistakes is removing a healthy branch that is simply dormant. In the depths of winter, a bare branch can look completely lifeless, tempting you to cut it off. But inside, it may be perfectly healthy and just waiting for spring. How can you tell the difference? This is where you become a ‘Branch Detective’ and use a simple, foolproof technique called the ‘scratch test’.
The science behind it is straightforward. Just beneath the outer layer of bark is a thin, green layer called the cambium. This is the living, vascular tissue of the plant, responsible for transporting water and nutrients. If the cambium is alive, the branch is alive. If it’s dead, the cambium will be brown and dry. The scratch test allows you to take a tiny peek at this layer without harming the branch.
This close-up view shows exactly what you’re looking for: the vibrant green of life under the dead-looking outer bark.
To perform the test, you don’t need special tools. Simply use your thumbnail or a dull knife to gently scratch away a very small section of the outer bark on a twig or branch. If you immediately see moist, bright green tissue, congratulations – your branch is alive and well! If the tissue underneath is brown, brittle, and dry, that part of the branch is dead. It’s a definitive, on-the-spot diagnosis that prevents you from making a tragic mistake and removing healthy wood that would have produced leaves and flowers in a few months.
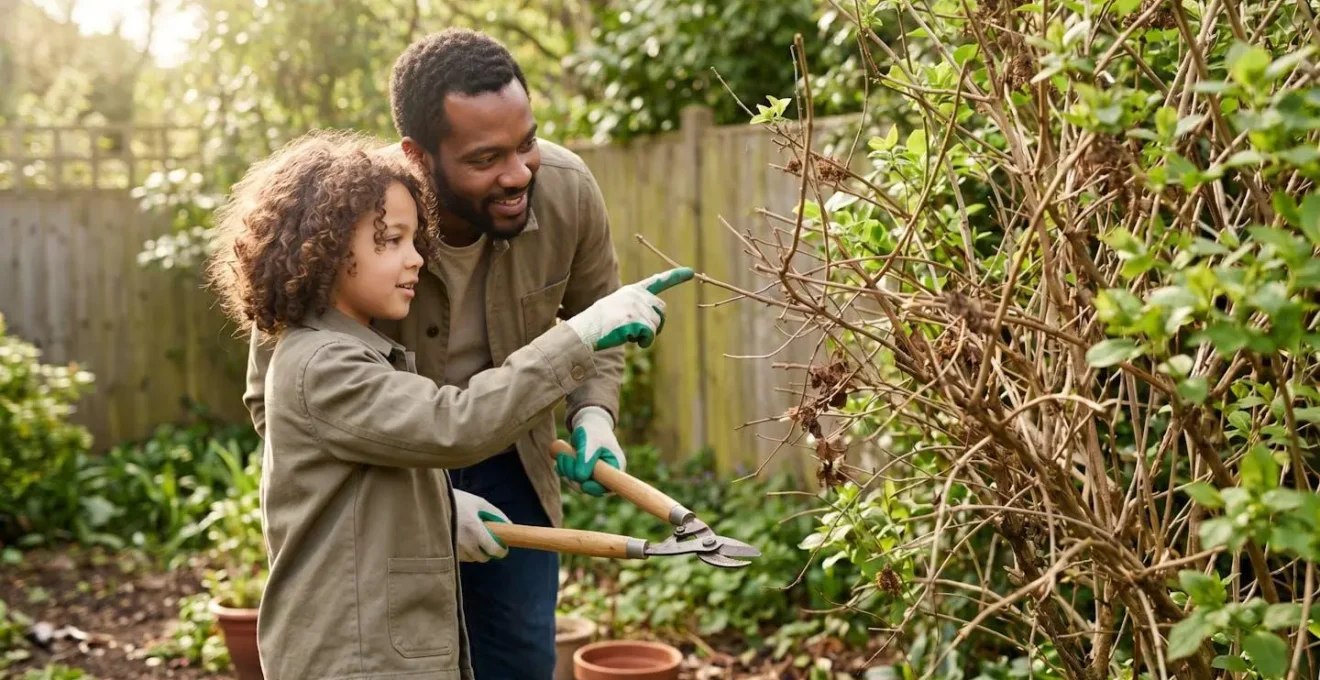
This is a great activity to involve children in, teaching them about plant biology in a hands-on way. Just be sure to supervise and use safe tools. If you find brown tissue, don’t give up on the whole branch immediately. Try scratching a spot a bit further down, closer to the main trunk. Branches often die back from the tip, but may still be alive closer to their source.
The scratch test replaces guesswork with certainty, empowering you to make informed cuts and save every viable part of your cherished plant.
Sealant or Air: How to Treat Large Pruning Wounds Correctly?
For generations, gardeners were taught to « paint » large pruning wounds with a black, tar-like sealant. The intention was good: to protect the open wound from insects and disease, much like a bandage on a human. However, modern arboriculture has shown this practice to be not only ineffective but often harmful. The ‘plant logic’ of healing is far more sophisticated than we thought, and the best treatment for a pruning wound is usually fresh air.
Case Study: Natural Wound Healing Through Branch Collar Activation
The key to understanding this is a specialized area of the plant called the branch collar—the slightly swollen ring of tissue where a branch joins the trunk. This ‘healing zone’ contains unique cells programmed to close over a wound. As scientific research from horticultural experts demonstrates, when a pruning cut is made correctly (just outside this collar), these cells are activated and begin to form a protective layer of callus tissue, like a natural scar. Conversely, studies show that applying wound sealants actually traps moisture against the wood, creating an ideal, dark, damp environment for fungal decay to thrive. Instead of protecting the wound, it seals in the problem, hindering the plant’s ability to heal itself.
The takeaway is clear: the plant has its own highly effective system for healing. Our job as gardeners is not to interfere with it, but to facilitate it by making the right kind of cut in the right place. A proper ‘collar cut’, angled slightly away from the trunk and leaving the branch collar intact, is the single most important factor in promoting rapid, natural healing. Don’t cut flush with the trunk, and never leave a long, ugly stub. Find the collar and cut just beyond it.
The following table summarizes the modern understanding of wound treatment, making the correct choice obvious.
| Treatment Method | Effectiveness | Risk Level | Recommendation |
|---|---|---|---|
| Wound sealant/paint | Low – traps moisture | High – promotes decay | Not recommended by arborists |
| Natural air exposure | High – natural callus forms | Low – tree heals itself | Best practice for all cuts |
| Proper collar cut placement | Very high – activates healing | None – natural process | Essential technique for large cuts |
| Leaving wound wet/wrapped | Very low – increases infection | Very high – disease entry | Avoid completely |
By trusting the plant’s innate ability to heal and providing it with a clean, well-placed cut, you give it the best possible chance for a speedy and healthy recovery.
How to Coppice Shrubs to Force Vibrant New Growth?
Coppicing is a dramatic and ancient pruning technique that feels extreme but produces incredible results. It is the ultimate ‘Great Reset,’ involving cutting certain shrubs almost to the ground in early spring. While it sounds brutal, the ‘plant logic’ behind it is to shock the root system into sending up a huge flush of new, young, and often more colorful stems. It’s a method of renewal that taps into the plant’s survival instincts to create a spectacular display.
This technique is not for every shrub. It is specifically used for species that are grown for their vibrant winter stem color, like red-twig dogwood (Cornus) and willows (Salix), or for those that flower on new growth and can become woody and sparse, like Butterfly Bush (Buddleia). As research from Rutgers Extension highlights, a wide range of shrubs including Spirea and others respond vigorously to this method. For dogwoods and willows, the youngest stems have the most brilliant color, so coppicing every few years ensures a constant supply of dazzling red, yellow, or orange stems that light up the winter garden.
The process is a ‘Phoenix Prune’—from the old stump, a vibrant new shrub arises. The first year after the cut is a ‘Rocket-Boost Rebirth,’ with an incredible amount of growth. You’ll want to thin these new shoots to the strongest 5-7 stems to create an open, ‘Fountain of Color’ structure for the following years. Not only does this rejuvenate the plant, but the harvested stems are perfect for bringing indoors for holiday decorations, wreaths, or winter arrangements, connecting your garden to your family life even in the coldest months.
For the right plant, coppicing is the most effective way to maintain vigorous health and ensure a spectacular show of color year after year.
Festooning: Bending Branches to Increase Fruit Buds in Small Spaces?
Sometimes, the most effective pruning technique doesn’t involve cutting at all. Festooning is a gentle training method that uses ‘plant logic’ to your advantage, particularly for young fruit trees or flowering shrubs in small spaces. The principle is simple but powerful: a branch’s orientation dictates its function. A vertical branch is in « growth mode, » using its energy to reach for the sky. A horizontal branch, however, switches to « reproductive mode, » putting its energy into producing flowers and fruit.
By gently bending a young, flexible branch down to a horizontal or near-horizontal position and tying it in place, you trick the branch into thinking it’s mature. This hormonal signal shift dramatically increases the formation of fruit buds along its length. It’s a fantastic way to encourage a young apple or pear tree to start producing fruit earlier, or to get more flowers on a climbing rose.
Case Study: The Lazy Branch Science Experiment
This technique is so effective you can prove it with a simple family experiment. On a young tree, select two similar branches. Leave one to grow vertically and gently bend the other to a horizontal position, securing it with soft cloth ties. Mark both with a ribbon. The following spring, you’ll find that the horizontal « lazy branch » is covered in blossoms. This method leverages the plant’s natural hormonal response, and as experts in plant renovation note, a trained horizontal branch can produce two to three times more fruit buds than its vertical counterpart. It’s a living science lesson in your own backyard!
The key to successful festooning is gentleness. Always use young, pliable branches from the current or previous season. Never force a branch that resists, and always use soft, wide ties (like strips of old fabric or nylon stockings) that won’t cut into the bark as the branch thickens. Check the ties periodically and loosen them as needed. After a season or two, the branch will have set in its new position, and the ties can be removed.
Festooning is a testament to the idea that sometimes the most powerful gardening tools are patience and a deep understanding of plant behavior.
Key takeaways
- The 1/3 Rule is Your Safety Net: Revive any overgrown shrub without fear by removing only one-third of the oldest stems each year for three years.
- Timing and Hygiene are Non-Negotiable: Prune ‘bleeders’ in summer and always use disinfected tools to prevent the spread of disease. This is critical plant first-aid.
- Trust the Plant’s Healing Power: A plant can heal its own wounds. Your job is to make a clean cut in the right place (outside the branch collar) and let air do the rest.
Structural Deciduous Shrub Varieties for Winter Interest in Urban Gardens
Once you’ve mastered the art of restorative pruning, you can begin to think about your garden’s structure with a designer’s eye. A well-chosen shrub is more than just a green blob; it’s a living sculpture that can provide beauty and interest all year round, especially in the starkness of winter. For urban gardens or family spaces, choosing plants with a strong winter character and a safe profile is essential.
Deciduous shrubs that reveal fascinating, architectural forms after their leaves drop are invaluable. Varieties like Harry Lauder’s Walking Stick, with its fantastically twisted branches, or Witch Hazel, with its fragrant winter flowers and zigzag stems, provide focal points and delight when the rest of the garden is asleep. These structural features aren’t just for looking at; they can become part of your family’s winter fun—the gnarled branches perfect for casting shadow puppets on a sunny wall, or the colorful stems of a dogwood harvested for crafts.
This table highlights a few imaginative choices that combine winter beauty with engaging family activities, all while being suitable for smaller garden spaces.
| Imaginative Name | Botanical Name | Winter Feature | Family Fun Activity | Mature Size |
|---|---|---|---|---|
| The Dragon’s Spine | Corylus avellana ‘Contorta’ | Twisted, gnarled branches | Shadow puppets on sunny winter days | 8-10 feet |
| The Underwater Coral | Hamamelis (Witch Hazel) | Fragrant winter blooms, zigzag stems | Collect petals for winter art projects | 10-15 feet |
| The Crimson Fountain | Cornus sericea (Red Twig Dogwood) | Brilliant red winter stems | Harvest stems for rustic bird feeders | 6-9 feet |
| The Golden Candelabra | Cornus sericea ‘Flaviramea’ | Bright yellow-green winter stems | Natural material for basket weaving | 6-8 feet |
However, as a restorative specialist focused on family gardens, a beautiful structure must be paired with safety. It is critically important to be aware that some common structural plants are highly toxic. When children and pets are in the picture, safety must always be the top priority.
- HIGHLY TOXIC – Avoid: Yew (Taxus species). All parts of this plant, especially the berries, are extremely poisonous and can be fatal if ingested by children or pets.
- HIGHLY TOXIC – Avoid: Daphne species. While beautiful, all parts of this plant are toxic, with berries that can be dangerously attractive to young children.
- TOXIC – Use Caution: Euonymus (Burning Bush) and Holly (Ilex species). The berries of these plants are toxic and can cause vomiting and diarrhea if consumed. Supervise children carefully around them.
For a truly family-friendly garden, always opt for non-toxic alternatives like the Dogwoods (Cornus) or Serviceberry (Amelanchier) that provide beauty without the worry.
Now armed with the knowledge to restore the old and choose the new, you can confidently step into your garden, not as a hesitant beginner, but as a thoughtful and knowledgeable caretaker.