Permanent soil improvement is not about adding compost annually; it’s about re-engineering the soil’s physical matrix with structurally durable amendments.
- Biochar offers century-long stability due to its chemical structure, unlike compost which decomposes relatively quickly.
- Adding sand to clay without a large volume of compost can create a concrete-like substance, worsening the problem.
Recommendation: Select amendments based on their Carbon-to-Nitrogen ratio and physical longevity for a truly permanent structural fix.
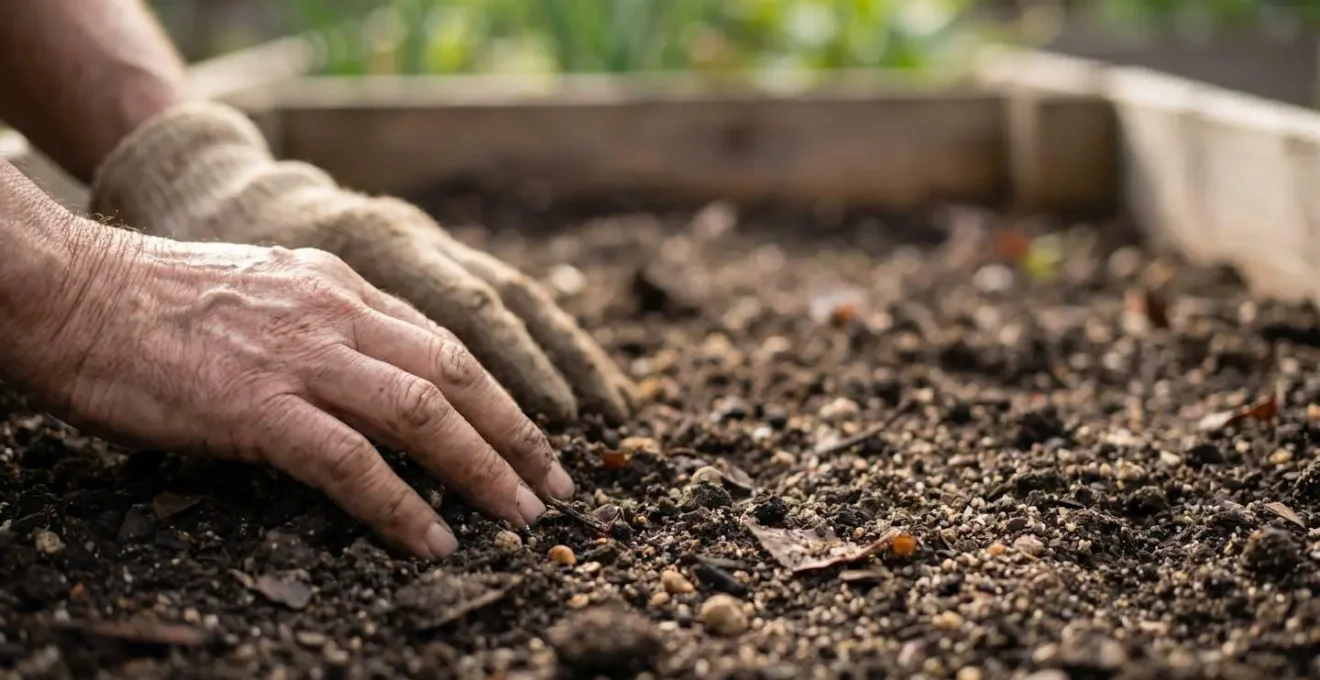
For gardeners, the annual battle with their native soil can feel like a recurring, unwinnable war. You either wrestle with heavy, waterlogged clay that bakes to a brick-like hardness, or you pour water and nutrients into sandy soil that seems to lose them instantly. The conventional wisdom is to « just add more compost, » a temporary solution that requires endless repetition. This approach treats the symptom—poor soil quality—but ignores the underlying physics of the problem.
This endless cycle of amending is rooted in a misunderstanding of the goal. We often focus on feeding the soil for a single season, rather than rebuilding its fundamental structure for the long term. If we shift our perspective from that of a farmer to that of a soil structure physicist, the entire problem changes. The key isn’t just about adding organic matter; it’s about adding the *right kind* of organic matter, in the right way, to create a permanent change in the soil’s physical matrix.
This article will deconstruct the geological principles behind permanent soil remediation. We will explore why some amendments provide century-long stability while others vanish in a year, how to apply them without destroying the very structure you’re trying to build, and debunk the common, often damaging, myths that trap gardeners in a cycle of frustration. Forget seasonal fixes; it’s time to engineer a lasting solution from the ground up.
To navigate this deep-dive into soil engineering, the following guide breaks down the core concepts, from the longevity of amendments to the practicalities of application and problem diagnosis. Each section provides a critical piece of the puzzle for building a resilient and permanently improved soil structure.
Table of Contents: Clay or Sand: Which Organic Amendments Fix Your Soil Type Permanently?
- Why Biochar Lasts 100 Years in Soil Compared to Compost?
- Digging vs Top Dressing: How to Apply Amendments Without Wrecking Structure?
- The Woodchip Error That Starves Your Plants of Nitrogen
- How to Make Leaf Mould: The ‘Gold Dust’ for Clay Soil Remediation?
- Mushroom Compost: Is It Too Alkaline for Your Rhododendrons?
- Compaction or Grading: Why is Water Pooling in the Middle?
- Sand or Compost: The Perfect Soil Mix for Rapid Drainage
- Correcting Land Grading to Stop Lawn Waterlogging in Winter
Why Biochar Lasts 100 Years in Soil Compared to Compost?
The fundamental difference between biochar and compost lies in their chemical stability and, consequently, their structural longevity in the soil matrix. Compost is a product of biological decomposition. It’s a rich, living material teeming with microbes that continue to break it down. While excellent for providing short-term nutrients and improving soil life, its physical structure is transient. Most of the carbon in compost is consumed and released as CO2 by soil organisms within a few years, requiring constant replenishment.
Biochar, on the other hand, is a product of pyrolysis—heating organic matter in a low-oxygen environment. This process fundamentally alters the carbon. Instead of the easily digestible compounds found in compost, pyrolysis creates a stable, crystalline carbon structure, almost like a carbon skeleton. This material is incredibly resistant to microbial decomposition. It doesn’t serve as a food source for most soil organisms, so its physical form remains intact. Think of it as the difference between a wooden house (compost) and a stone one (biochar). One is subject to rot and decay, while the other persists for millennia.
This structural permanence is why biochar is a powerful tool for re-engineering soil. Each tiny piece of biochar acts as a permanent pore space, improving aeration in clay and water retention in sand. Its vast surface area provides a lasting habitat for beneficial microbes, but the structure itself remains. By adding biochar, you are not just feeding your soil for a season; you are installing a permanent physical framework that will improve drainage, aeration, and nutrient-holding capacity for a century or more, making it a true one-time investment in your soil’s architecture.
This distinction is crucial: compost is a soil feeder, while biochar is a soil builder. For a permanent fix, focusing on the builder is paramount.
Digging vs Top Dressing: How to Apply Amendments Without Wrecking Structure?
The traditional gardening image involves a spade and rigorous double-digging, turning over the soil to incorporate amendments. From a soil physicist’s perspective, this is often an act of controlled destruction. Healthy soil has a delicate, established structure of aggregates, fungal networks, and worm channels. Aggressive tilling and digging shatters these aggregates, collapses pore spaces, and decimates the very life that creates good structure. It’s like demolishing a building’s internal framework to redecorate a room.
The superior method for preserving and enhancing soil structure is top dressing, also known as sheet mulching or « lasagna gardening. » This no-dig approach mimics nature’s own process. In a forest, leaves and branches fall on the surface, and soil life (worms, fungi, bacteria) works to pull that organic matter down into the soil profile. This builds structure from the top down without mechanical disturbance. By layering amendments on the surface, you feed the soil ecosystem and allow it to do the work of incorporation for you.
This method protects the existing soil structure while adding new material. The layers of mulch also suppress weeds, conserve moisture, and regulate soil temperature. It’s a slower process, but it builds a far more resilient and self-sustaining soil matrix over time.
As the illustration of a lasagna garden bed demonstrates, this is a methodical process of layering. The initial cardboard layer smothers existing vegetation, and subsequent layers of « green » (nitrogen-rich) and « brown » (carbon-rich) materials create a self-composting pile in place. Earthworms and other organisms are attracted to this feast, and their movement through the layers and into the native soil below is what performs the « tilling, » creating deep, stable channels and improving the structure without any destructive digging.
Ultimately, choosing top dressing over digging is a choice to work *with* the physics and biology of your soil, rather than against it, leading to a more robust and permanent structural improvement.
The Woodchip Error That Starves Your Plants of Nitrogen
Fresh woodchips are often touted as a cheap and plentiful source of organic matter, but incorporating them incorrectly into soil is one of the most common and damaging mistakes a gardener can make. The issue isn’t that wood is bad for soil; it’s a matter of chemistry, specifically the Carbon-to-Nitrogen (C:N) ratio. Wood is extremely high in carbon but contains very little nitrogen. The microorganisms that decompose organic matter need both elements to build their bodies and carry out their work.
When high-carbon, low-nitrogen material like fresh woodchips is mixed into the soil, the microbial decomposers face a problem. They have an abundance of carbon to eat but not enough nitrogen. To solve this, they pull available nitrogen from their surroundings—the soil itself. This process is called nitrogen immobilization. The nitrogen is locked up in the bodies of the microbes, making it temporarily unavailable to plants. This can lead to yellowing leaves and stunted growth, effectively starving your plants in a soil that might otherwise be fertile. As ICL Growing Solutions explains in their technical guide:
When a material contains a lot of carbon but very little nitrogen, microbes cannot find enough nitrogen within that material and to continue decomposing it, they draw nitrogen from the surrounding substrate, locking it temporarily away from the plant.
– ICL Growing Solutions, C:N Ratio in Growing Substrates Technical Guide
The effect is not trivial; U.S. Geological Survey research confirms that wood chips with a high C:N ratio can result in the immobilization of between 19 and 38 kg N per hectare in the first year. This means that while you intended to improve your soil, you’ve inadvertently created a nitrogen-deficient environment. The solution is to use woodchips strategically: apply them as a surface mulch on paths where they won’t interfere with plant roots, or let them age for at least a year. As they decompose and turn dark and crumbly, their C:N ratio lowers, and they become a beneficial soil amendment rather than a nitrogen thief.
Understanding the C:N ratio moves you from a gardener who just adds « stuff » to one who strategically manages the soil’s biochemical processes for a permanent, positive outcome.
How to Make Leaf Mould: The ‘Gold Dust’ for Clay Soil Remediation?
For gardeners battling heavy clay, leaf mould is nothing short of geological « gold dust. » While compost provides nutrients, leaf mould provides structure. It is the product of a slow, cool, fungal decomposition of deciduous leaves, a process that creates a unique substance perfectly suited to re-engineering the physical properties of clay soil. Unlike the bacterial-driven, rapid breakdown of a hot compost pile, the fungal process in a leaf mould pile creates long-chain, resilient organic compounds.
When mixed into clay, these compounds work miracles. Clay soil is composed of tiny, flat particles that easily compact, squeezing out air and water channels. The fibrous, spongy structure of leaf mould physically separates these clay platelets. More importantly, it encourages a process called flocculation, where the tiny clay particles clump together into larger aggregates. This creates macropores—the larger spaces essential for drainage, air circulation, and root penetration. The result is a transformation of dense, unworkable clay into a friable, crumbly loam. Furthermore, studies show leaf mold can increase water retention by over 50%, turning clay from a substance that is either waterlogged or bone-dry into a moisture-retentive sponge.
The texture of finished leaf mould is a testament to its power. The fine, crumbly, dark material is the physical manifestation of fungal breakdown, perfectly designed to integrate into and improve a dense soil matrix.
Making this valuable amendment is surprisingly simple, requiring more patience than effort. A straightforward method involves little more than leaves, water, and time.
- Collect: Gather fallen deciduous leaves in autumn. Stuff them into sturdy plastic bags.
- Moisten: Soak the leaves thoroughly with a hose. The fungi that create leaf mould need a moist environment to thrive.
- Wait: Tie the bags up, poke a few holes for air, and store them in a shady spot. Check occasionally to ensure they remain damp.
- Harvest: After about 12 months, you’ll have a dark, crumbly leaf mould ready to be incorporated into your clay soil. Shredding leaves with a lawnmower beforehand can speed the process up to about 6 months.
By harnessing the slow power of fungal decay, you can create a superior soil conditioner that provides a permanent structural fix for the most challenging clay soils.
Mushroom Compost: Is It Too Alkaline for Your Rhododendrons?
Spent mushroom substrate, commonly sold as « mushroom compost, » is another widely available soil amendment. It’s the leftover medium after a crop of commercial mushrooms has been harvested. While it is rich in organic matter and can improve soil structure, it comes with a significant chemical caveat: it is often highly alkaline. This is a critical detail for gardeners, as soil pH is a master variable that controls nutrient availability for plants.
The alkalinity comes from the ingredients used to grow the mushrooms. The process typically involves a base of composted straw or manure, but a « casing layer » is added on top to trigger mushroom formation. This layer often contains a significant amount of chalk or lime (calcium carbonate), which raises the pH to a level that is optimal for the mushrooms but potentially problematic for the garden. The final pH of spent mushroom substrate is typically in the 7.5 to 8.0 range, which is neutral to alkaline.
This is where the rhododendrons come in. Rhododendrons, along with azaleas, blueberries, and camellias, are « ericaceous » or acid-loving plants. They thrive in a soil pH of 4.5 to 5.5. In an alkaline environment, they are unable to take up essential micronutrients, particularly iron. This leads to a condition called iron chlorosis, where the leaves turn yellow between the green veins, growth is stunted, and the plant eventually fails. Adding alkaline mushroom compost around a rhododendron is like feeding a person a diet they are physically unable to digest; it will lead to malnutrition regardless of how much « food » is available.
Therefore, while mushroom compost can be a useful amendment for vegetable gardens that prefer a more neutral pH, it should be used with extreme caution or avoided entirely for acid-loving plants. Always consider the chemical properties, not just the physical ones, when choosing a soil amendment.
Compaction or Grading: Why is Water Pooling in the Middle?
When water pools in your lawn or garden bed, it’s a clear signal of a drainage problem. But before you can apply a solution, you must diagnose the cause. Is the water unable to soak *down* into the soil, or is it unable to run *off* the surface? This is the fundamental difference between a compaction problem and a grading problem, and misdiagnosing it can lead to wasted effort and expense.
Compaction is a subsurface issue. It occurs when the soil particles below the surface have been pressed together so tightly that the pore spaces are eliminated. This creates an impermeable layer, often called a « hardpan, » that water cannot penetrate. This is common in areas with heavy foot traffic, or where heavy machinery was used during construction. A tell-tale sign of compaction is that water pools after rain and just sits there for days, eventually evaporating rather than draining away. The surrounding soil might be dry, but the puddle remains.
Improper grading, on the other hand, is a surface issue. It means the topography of the land itself is trapping water. Your lawn might have a dip or a low spot where water naturally collects from surrounding higher areas. It’s a problem of physics and gravity. A key indicator of a grading issue is that water not only pools in one spot but you can also see it flowing *towards* that spot during heavy rain. The soil in the puddle might be perfectly healthy and capable of drainage, but it’s overwhelmed by the volume of water being directed to it from the larger area.
Correctly identifying the root cause is the most critical step before undertaking any remediation work. A simple audit can help pinpoint the exact nature of the drainage failure.
Action Plan: Diagnosing Your Water Pooling Problem
- Point of Contact Analysis: After a heavy rain, map every location where water stands for more than a few hours. Is it one large area, or several disconnected spots?
- Percolation Test: In the center of a puddle (once it has drained), dig a hole about one foot deep. Fill it with water and time how long it takes to drain. If it takes more than 4-5 hours, you likely have a subsurface compaction issue.
- Surface Flow Observation: During the next rain, go out and observe the water’s movement. Does water from a large area of your lawn all flow toward the puddle? If so, it’s likely a grading issue. Use stakes to mark the high and low points.
- Root Zone Inspection: Dig up a small patch of turf in the problem area. Are the roots shallow and growing sideways? This is a classic sign that they cannot penetrate a compacted layer below. Healthy roots should grow straight down.
- Plan Integration: Based on your findings, formulate a plan. If the percolation test failed and roots are shallow, your priority is aeration and breaking up compaction. If water flows towards the spot, your priority is re-grading the surface.
By acting as a detective and understanding the physics of your specific site, you can choose the correct engineering solution for a permanent fix.
Sand or Compost: The Perfect Soil Mix for Rapid Drainage
The intuitive « fix » for heavy clay soil—adding sand to « lighten » it—is one of the most persistent and destructive myths in gardening. This approach ignores the physics of soil particle size. Clay particles are microscopic and flat. Sand particles are comparatively massive and round. When you mix a small amount of sand into clay, you are not creating a loamy soil. Instead, the tiny clay particles coat the large sand particles, using them as a bridge to pack together even more tightly. This process can create a substance akin to a low-grade concrete. As Linda Brewer, an expert at OSU Extension, warns:
No amount of sand added to clay soil will change its texture. The large sand particles provide a surface for clay to cling to, which can create even more difficult conditions.
– Linda Brewer, OSU Extension, Clay soil challenges and solutions for Oregon gardeners
The key to using sand correctly is to change the ratio drastically and, most importantly, to always include compost. The goal is not to amend the clay, but to create an entirely new soil mixture where sand is the dominant component and clay is the minor one. The compost is not optional; it’s the critical third ingredient that makes the system work. It prevents the clay particles from binding to the sand and fills the large pores created by the sand with nutrient- and water-holding organic matter.
For a successful structural change, a specific protocol must be followed to ensure the ingredients are combined in the correct ratios and integrated properly. The goal is to create a homogenous mixture, not layers of different materials.
- Never Add Sand Alone: This is the cardinal rule. Always add sand along with an equal or, preferably, greater volume of compost.
- Use the Right Sand: Use coarse builder’s sand or sharp sand. Fine play sand will not create the large pore spaces needed for drainage.
- Mix Thoroughly: The amendments must be thoroughly integrated into the top 6 to 8 inches of the native soil using a tiller or garden fork to prevent layering.
- Follow Ratios for Specific Uses: For creating ideal soil in raised beds, especially for root vegetables that need loose soil, a proven ratio is approximately one part native soil, one part coarse sand, and two parts compost.
By understanding the roles of all three components—sand for pores, compost for life and fertility, and clay as a minor structural element—you can successfully engineer a perfect, fast-draining soil mix.
Key Takeaways
- Focus on structural longevity (e.g., Biochar) over simple nutrition (e.g., fresh Compost) for a truly permanent soil fix.
- Avoid nitrogen lock-up by understanding the C:N ratio of amendments; use high-carbon materials like fresh woodchips only as surface mulch, not incorporated into soil.
- Never add sand to clay soil without an equal or greater amount of compost, as this can create a concrete-like substance and worsen compaction.
Correcting Land Grading to Stop Lawn Waterlogging in Winter
When winter rains turn a section of your lawn into a shallow pond, and you’ve ruled out compaction, the culprit is almost certainly the land’s grading. This means the surface topography is directing water to a low point and holding it there. Correcting this is a problem of applied physics: you need to reshape the surface to either redirect the water to a desirable location or allow it to spread out over a larger area so it can soak in without overwhelming the soil.
For minor grading issues, you don’t necessarily need heavy equipment. Subtle changes can be made over time using simple topdressing techniques. This involves repeatedly applying a thin layer (no more than half an inch) of a soil/compost mix over the low spot. The grass will grow up through this layer, and over several applications, you can raise the soil level enough to eliminate the depression. This is a slow but non-disruptive method for leveling a lawn.
For more significant issues where a large volume of water is being channeled to one area, a more engineered solution may be required. One highly effective method is creating a swale. A swale is a shallow, wide ditch with gently sloped sides, often built along the contour of a slope. It’s designed to intercept surface runoff, slow it down, and allow it to percolate into the ground. A properly designed swale can turn a drainage problem into a water conservation feature, effectively irrigating the area below it. Another option is a French drain—a trench filled with gravel and a perforated pipe that collects and channels water away to a suitable outlet, like a dry well or a municipal storm drain.
Stop fighting your soil and start re-engineering it. By applying these geological principles, you can move beyond temporary fixes and build a resilient, productive garden foundation. The first step is to apply these strategies and transform your soil’s structure for a lifetime of better gardening.